Fashion pieces simulated using software like Clo 3D can be hard to integrate into immersive 3D web experiences like Hubs. Problems are the limited support for mesh-based animation data and the fact that it tends to produce extremely large files. Using Blender, we can tackle both problems.
The first thing to consider is how to export from Clo 3D to Blender. To save geometry and thus later file size the topstich should be set to Texture in Clo 3D. This bakes the stitching into the textures of the cloth which is a lot cheaper than exporting it as actual geometry. For the export of the simulated cloth there is only the mesh-based option where the position for each single vertex of the mesh is stored for each frame of the animation. Newtek MDD is the format of choice here because it imports the mesh animation as a series of animated shapekeys which is exactly what Hubs is expecting.
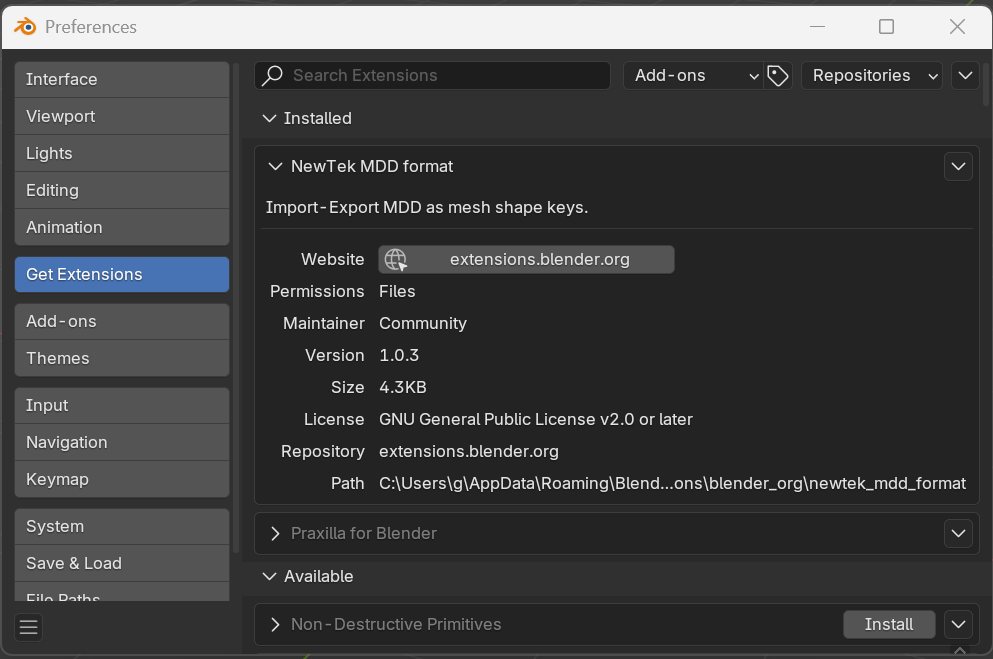
The Newtek MDD importer is an extension that can be downloaded right from inside Blender from Preferences -> Get Extensions. In case this is the first time you opened up this part of Blender, it will ask you whether Blender should be allowed to access the internet. After giving consent a search bar appears where you can search for MDD.
The MDD format importer in Blender expects a selected mesh to work because this is where it will store the animation in shapekey data. That means in Clo 3D the garment should be exported both as MDD and as OBJ format. Then import first the OBJ, select the imported cloth object and then import the MDD. When exporting an MDD cache from Clo 3D for import in Blender you might need to invert the Z-axis in the Clo 3D export settings, otherwise the result might have flipped normals, which in turn can lead to trouble further down the road. After the import you can check whether the normals are correct or whether your object is "inside-out" by turning on Face Orientation and Statistics in the overlays for the 3D viewport which you can find on the right of the header. A blue overlay will mean you are looking at the front of a face, a red overlay means you are looking at the back. The back of the faces is invisible in most realtime applications.
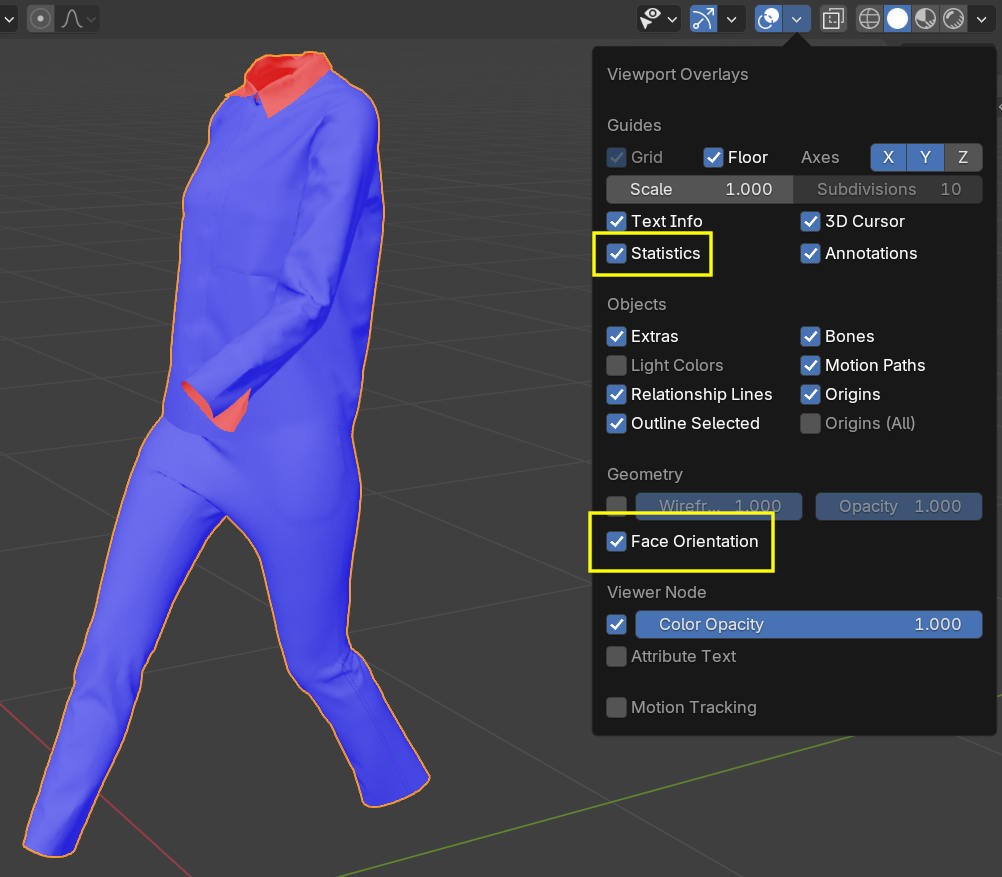
For performance reasons, clothes are usually single sided in realtime computer graphics applications, with the backside being invisible. To fix any red areas like the collar in this example select the red faces in edit mode and then use Mesh -> Normals -> Flip.
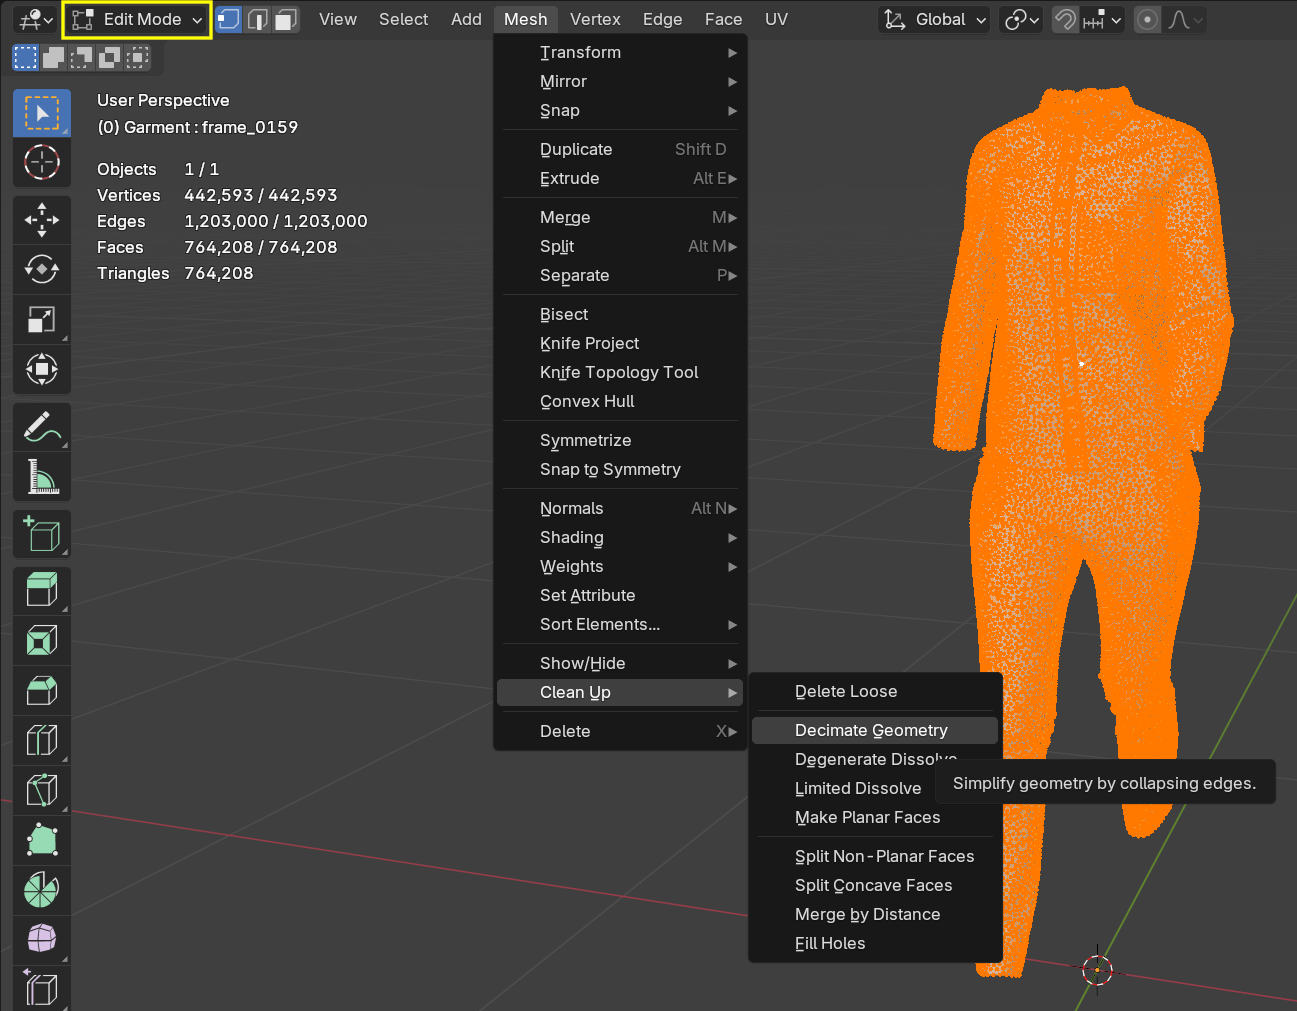
Now it is time to look at the statistics of your model. Mesh animation can tend to produce huge files which each user will have to download before getting immersed in your 3D world. At a mesh size of 500.000 faces, ten seconds of animation can result in files over one gigabytes in size just for the cloth animation. Too keep this reasonable, a target amount of 50.000 faces or less worked well in our tests. Since our model uses shapekeys, we cannot use the decimate modifier to reduce the amount of geometry. But we can do so in edit mode, but beware that this operation is destructive so better save a backup of your cloth before continuing. When you are ready to reduce the density of the mesh go to edit mode, select everything by hitting A on the keyboard and then Mesh -> Clean Up -> Decimate Geometry.
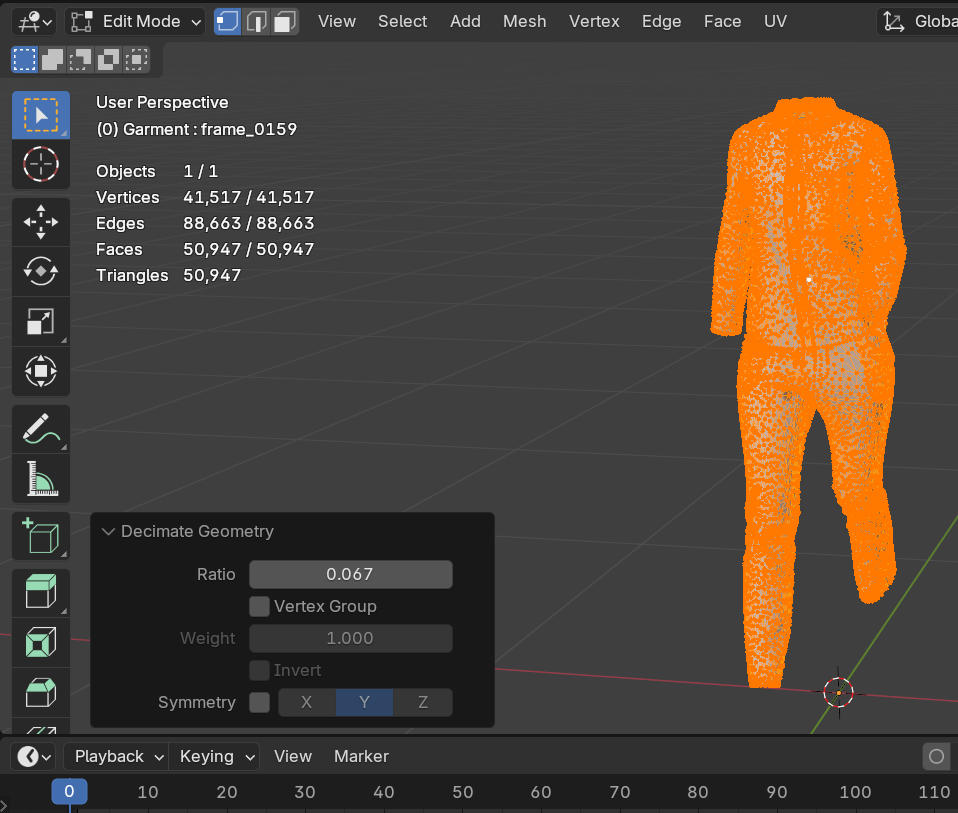
After running the operation, a very small popover should have appeared on the bottom left of the 3D viewport. Open it up by clicking on the arrow to the left. The most important setting is the ratio, which will define how many faces are left. For example when there are 5000 faces initially and the ratio is set to 0.1, we will end up with 500 faces.
One really nice thing about Blender is that all fields have a kind of integrated calcuator. To get to the 50k target face count while starting with roughly 750k, we can enter 5/75 into the field. Blender then automatically computes the resulting 0.067 and we end up with our desired face count of roughly 50k.
After decimation go back to object mode. Depending on how aggressively you decimated, some shading issues might arise but most of the time the result is decent. The UVs should also be preserved.
While you can see the animation of the cloth in Blender when you are scrubbing the timeline, it will not show up when exported to hubs. For that we first need to create an action. Since the animation is stored ins shapekeys, we need to go to the Shape Key Editor. Go to the animation workspace and in the editor space on the bottom switch from Dope Sheet to Shape Key Editor.

There you can see that the shape keys use their own type of action. We need the action in the NLA Editor. You can transfer it over there by clicking on the button Push Down. Now the action and it's associated keyframes has disappeared from the Shape Key Editor.

Now the cloth is prepared for the export to Hubs, the animation will play when loading the file. It can be looped by using the Loop Animation Component of the Hubs exporter addon and even be triggered using behavior graphs.
