

")
Cycles is a great production renderer, but it currently struggles with one thing: caustics! Thankfully there are other open source render engines available. One is of particular interest for this case: appleseed. This quick tutorial shows how to render caustics in Blender with Blenderseed, the appleseed plugin for Blender.
The following is a simple scene consisting of a diffuse plane as ground, a model of a drinking glass with a glass shader and one spot lamp as a light source. After rendering with Cycles for 1,5 hours on a Geforce GTX 1080 it looked like this:

Here is the same scene after 1,5 hours of rendering on the CPU using the appleseed render engine with Stochastic Progressive Photon Mapping (SPPM) enabled:

The image above shows that there are some situations where switching to a different render engine is justified. If you don't know what appleseed is, check out their homepage. If you want to tinker with Blenderseed, the appleseed plugin for Blender, grab it on the Blenderseed releases page where you can also find a quick 2 min video showing how to install and enable it.
In order to render caustics in appleseed efficiently, SPPM and Caustics have to be turned on. You can find the settings in the "Sampling" and "Lighting" sub-sections of the render tab. Depending on how much of your image will feature caustics prominently, using SPPM for direct lighting as well is a good idea. That way the SPPM patterns that are showing up when a render is stopped prematurely will also be visible where the scene is lit by direct light.
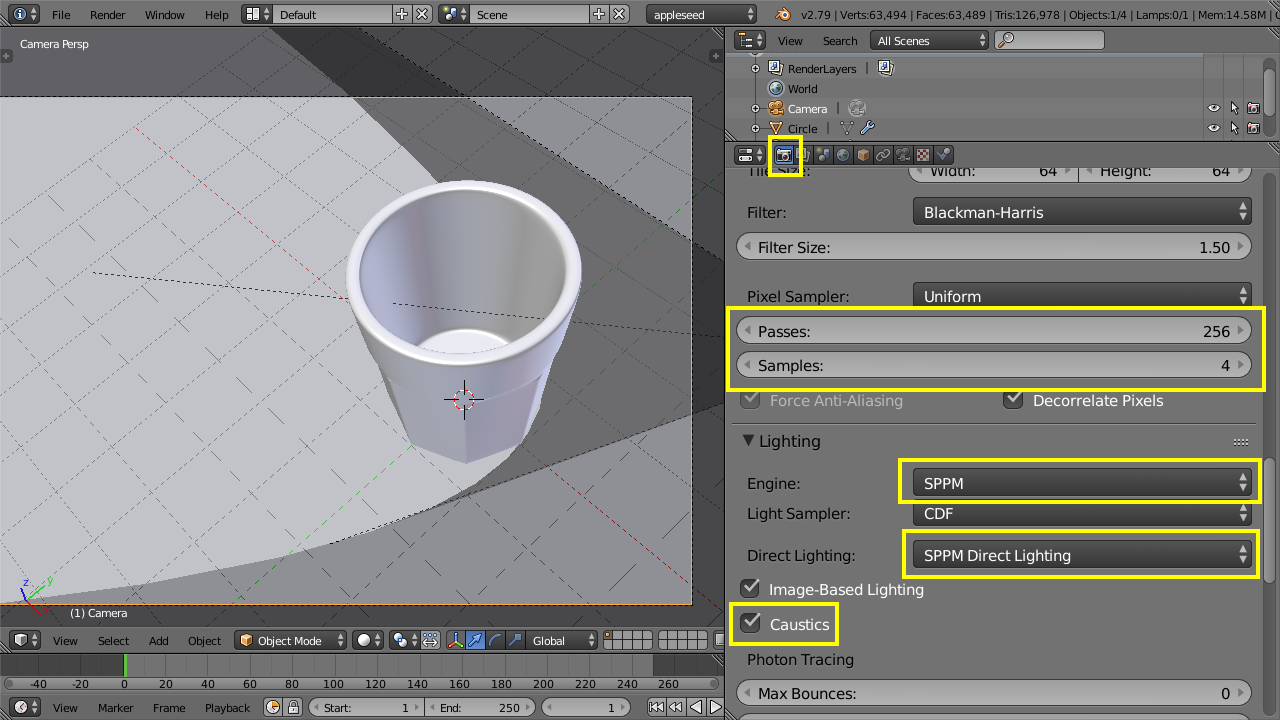
Another important setting are the "Passes". Those work as if the render would start over and over again with different seeds, gradually refining the image. For SPPM the number of passes should be set very high because with each pass, new photons will be added to the scene. The number of antialiasing samples should be set very low then because they are getting multiplied by the number of passes. So 256 passes and 4 antialiasing samples will result in 1024 total antialiasing samples (which work similar to samples in Cycles).
Download the .blend example here!