

")
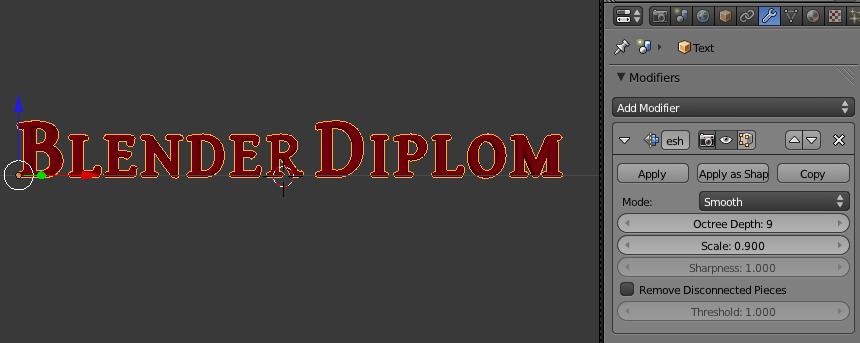
To cut the text up into tiny little pieces, it needs to be converted to a mesh. Select the text, hit Alt+C and choose "Mesh from Curve/Meta/Surf/Text". Now when you enter Edit Mode, you can no longer edit the text but you see a mesh with horrible topology. In earlier versions of Blender you would have had to re-topo the entire text. Now things have become a lot easier. If you use two seperate text objects, join them with Ctrl+J. Next add a 'Remesh' modifier. It's a new modifier introduced in version 2.62 of Blender and converts the topolgy of a mesh to roughly equal-sized quads. That's perfect for what we are up to. Uncheck 'Remove Disconnected Pieces' and set the 'Octree Depth' to the maximum of 9. Also use 'Smooth' as the mode since 'Sharp' will probaly introduce nasty artifacts. When you look closely at the text now it's made of tiny little quads. Each of these quads will later be one piece of logo-dust.
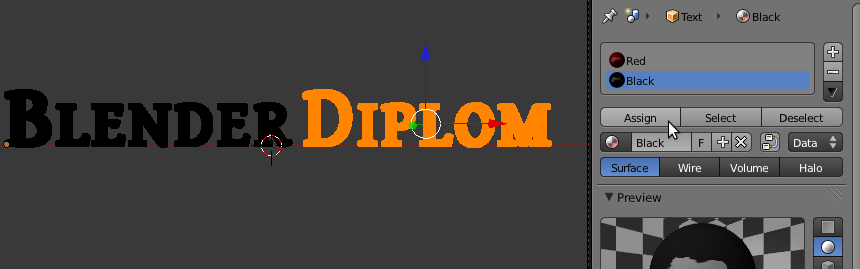
Usually modifiers should not be applied unless it's absolutely neccessary. This is one of the cases so hit 'Apply'. If you are using a two-part logo, then you might have noticed that the entire mesh now has the same material. To fix that go to edit mode and box-select the part that should have the other material. Assign it and everything should be fine again. Set the shading of the entire object to 'Smooth'. You can find that setting on the left in the tool-shelf.
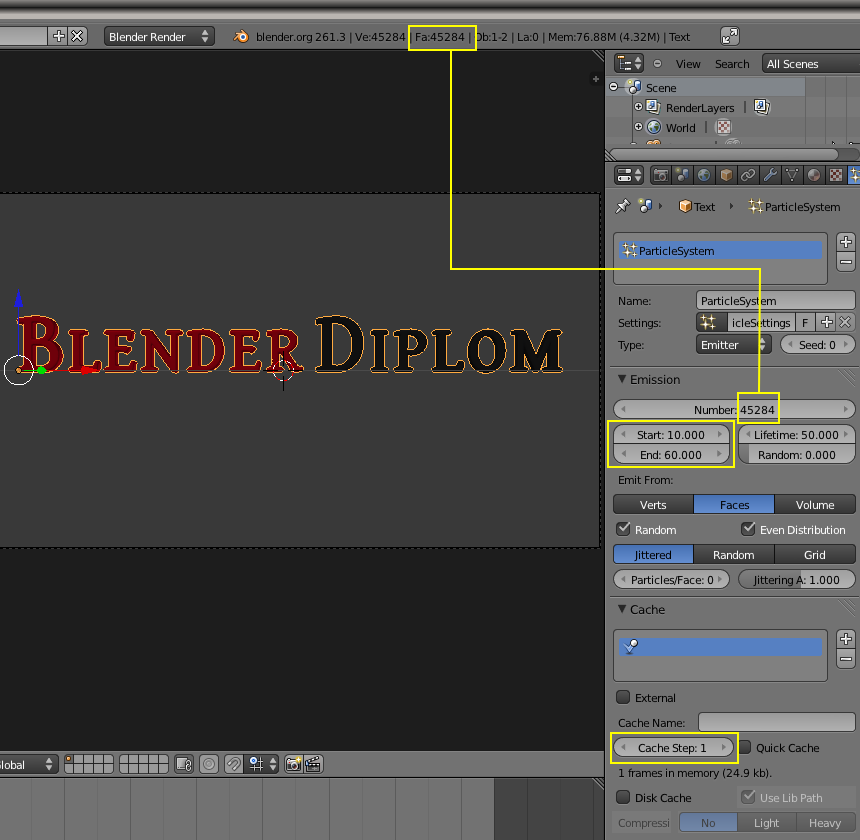
The small flying debris will be controlled by particles. Select the logo in object mode and add a particle system. The settings for start- and end define the duration of the dissolve process (10 and 60). The lifetime (50) defines how long the dust will take to fade out. Under 'Cache' set the step-size to 1. This will let calculations take longer but make the simulation more stable. One very important setting is the number of particles. It should be exactly the same as the number of faces. You can find the number of faces visible in the top header of Blender. Since the scene does not have any faces but from the logo, use exactly that number (Note: If you are using Blender 2.64 or higher, use a number slightly higher, that's a workaround for a bug):
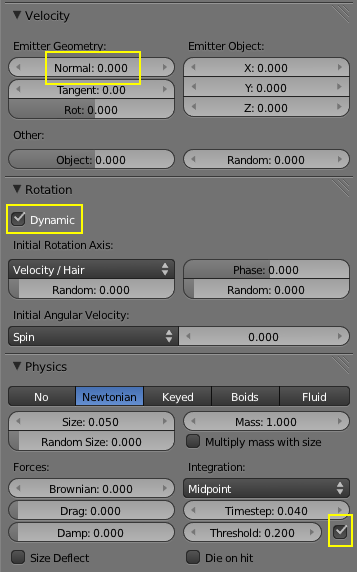
A few further settings are required for the particle system. At the moment, the particles are shot away from the mesh. Under 'Velocity' turn 'Emitter Geometry - Normal' to 0 and the problem is fixed. Later on, when the particles are flying around, they should rotate a little. Under 'Rotation' turn on 'Dynamic'. There is one important new setting in the 'Physics' section. In the 'Render' section select 'None'. Thus the particles will not be visible in the render. We will later be using an explode modifier to render them as shards. But since you might want to see them in the viewport, turn on 'Points' in the display-section. Lastly go to the 'Field Weights' and turn 'Gravity' down to 0. Now the particles should stay in their place. Check it by scrubbing through the timeline.

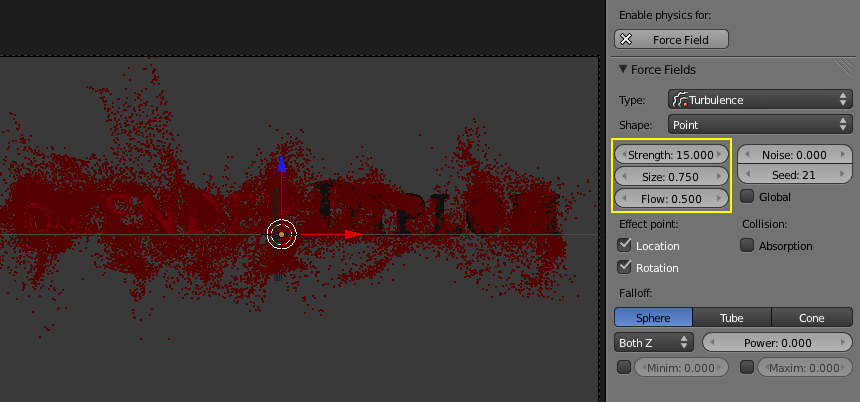
To get the organic movement of the particles add two force fields (Shift+A -> Force Field). First a Wind Field. Rotate it -90 degrees on the Y-axis (R|Y|-90). This will blow the particles to the right. Second a Turbulence Field with the following settings. 'Size' defines the basic size of the turbulences in Blender Units. 'Flow' will make the field act more like the flow in water. The results will be some nice looking cords. Preview the animation with Alt+A.
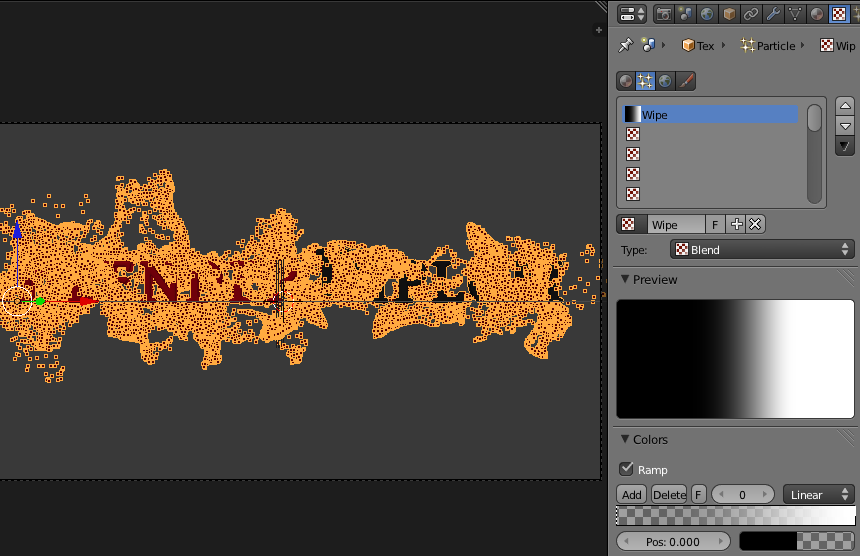
This already looks smooth and organic. To make the particles spawn from left to right select the logo again and add a Particle Texture (by choosing the particle symbol in the textures tab instead of the material one). Choose 'Blend' as the type and turn on ramp for the colors. This texture will influence particles according to its greyscale values. Fortunately, 'Time' is already set under influences so you can check out the result.
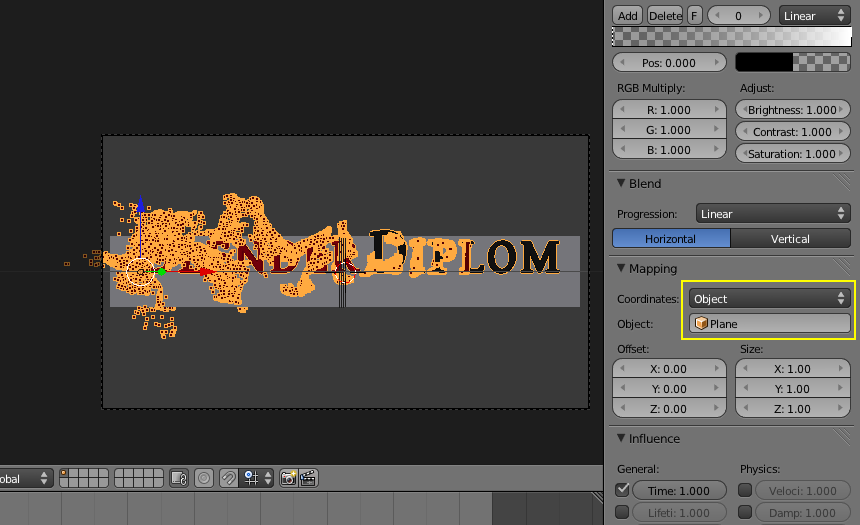
When you play back the animation now with Alt+A, only a fraction of the logo will behave correctly. The reason for that is we need to change the mapping. A really cool trick to change the mapping without much hassle but with a lot of control is by using an object for that purpose. Add a plane, rotate it by 90 degrees on the X-axis (R|X|90) and scale it in Object Mode along the X-axis (S|X) until it is a little broader than the logo. Now the texture coordinates are projected from the plane onto the text. Which means that we got a very simple object (the plane) controlling the mapping of the texture onto a very complex object (the text). Cool, eh?
Now the particles are working as desired. Turn off the renderability of the plane in the outliner and set its display type to 'Wire' in the Object properties. Now for the last part - make the particles render as shards. Add an 'Explode Modifier' to the logo:
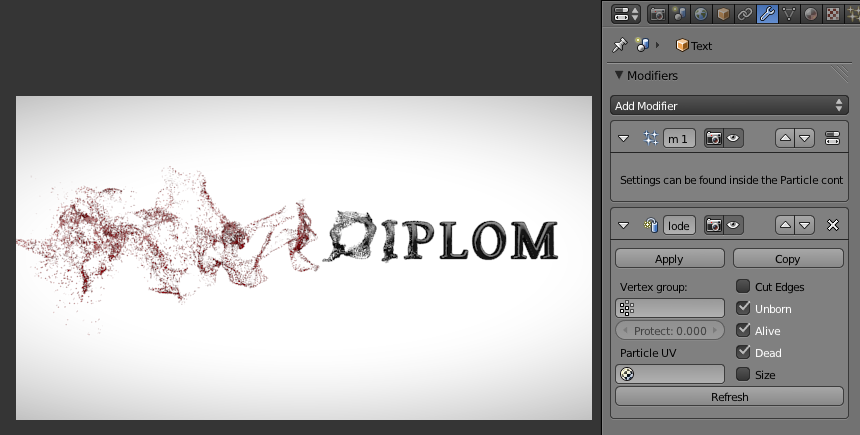
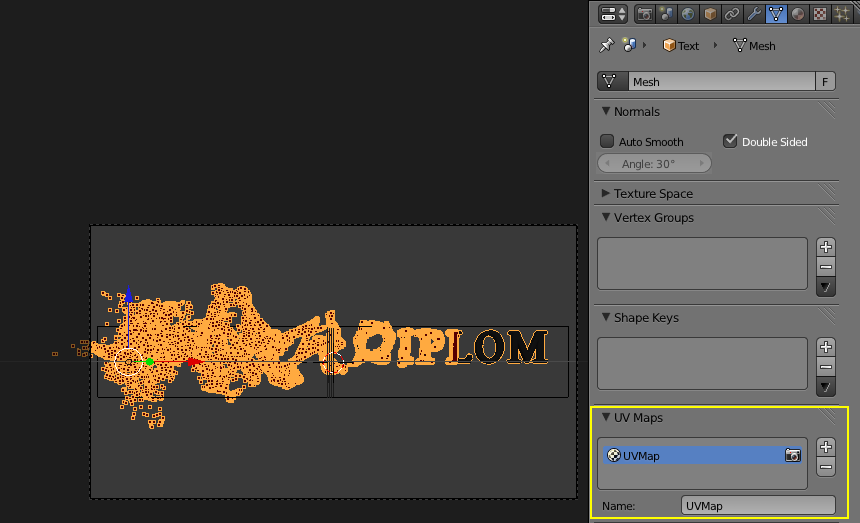
Wow! Nearly there! But if you render out the animation, you will notice that the particles just die off. To make them fade away nicely the explode modifier can use a texture on a UV layer. No need to unwrap anything. Just go to the Object Data and add a UV map.
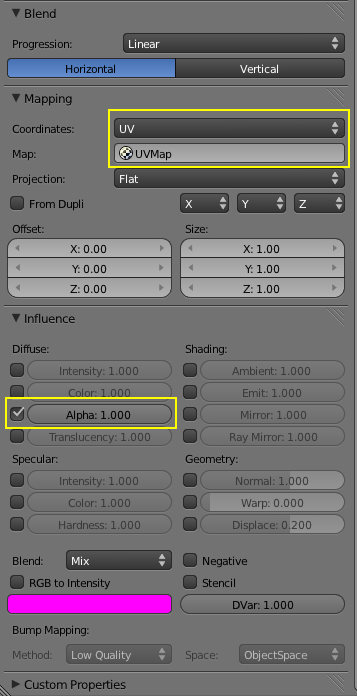
Go to the textures tab and add another material texture. Change the type to 'Blend' and enable 'Ramp'. The modifier takes the color values from left to right for the time. Flip the ramp and set the interpolation to 'Ease' for some smoother fadeout. As mapping just select 'UV' and the freshly created map and for influence select 'Alpha'. If you use two materials like I do, don't forget to set up the texture for both of them.

Go to the materials panel and turn on Z transparency and set it to 0 for both diffuse and specularity. Don't forget to do this for both materials. Now if you render, everything is somewhat transparent:

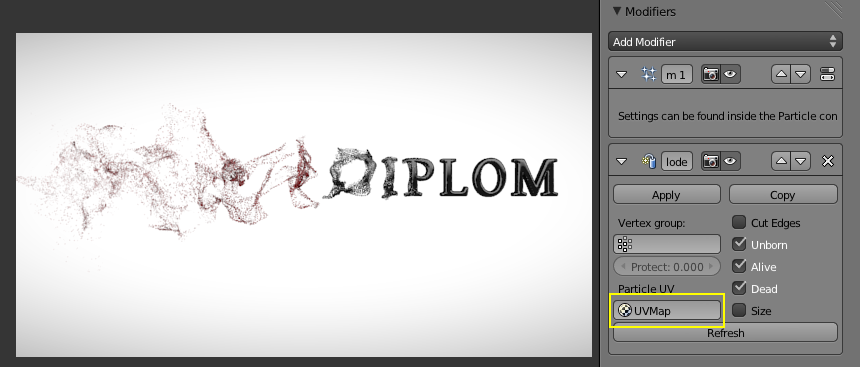
To get the nice fade-out effect one last step is required. Go back to the explode modifier, select the UVmap and voila. This setting is actually a hack that was added by the developers of Blender because the current particle system does not allow easy access to the particle lifetime, so it's something you just have to know and that's not very straightforward.
Here some tips for the final render. If your shards are very small, use 'Sampled Motion Blur' instead of Vector Blur because Vector Blur has difficulties with very small pieces. Full Sample Motion Blur also looks a lot better. If you are using bigger shards, giving them some depth via the 'Solidify Modifier' will also enhance the look but add rendertime. One way to save rendertime is to disable both Environment Lighting and Raytracing and using several lamps to light the scene instead.
I hope you enjoyed this tutorial. It proves that Blender now has capabilities that have been the domain of other packages like Houdini for a long time. If you have any comments, suggestions or just want to say thank you, don't hesitate to do so in the comments below. Happy Blending!
Download finished Blendfile here!
- 1
- 2