

")
Whatch the preview:
The effect is based around a voxel data texture with the heat values of the the smoke as source. This tutorial assumes that you are already familiar with the smoke simulation in Blender 2.5. You can also download the finished blendfile.
Set up a domain and two flow objects like in Figure 1, the required settings can be found in the image. Most important is that the upper flow object gets a negative value for the temperature difference while the lower one gets a posiitive value. I used rather large values because this helps when later on the smoke shader is applied. Notice that the locations of the two flow objects are a little off on the x-axis to get the diagonal effect when the two clouds hit each other.

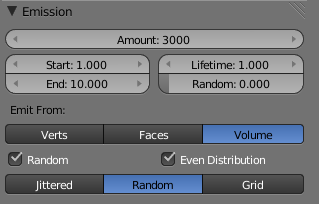
The settings for the particle systems of the two flow objects is the same and can be seen in Figure 2. Other values than emission have not been changed. This kind of emission ensures rampant particle movement inside and in the near neighborhood of the flow objects for the first 10 frames which will result in puffs of smoke with even density.
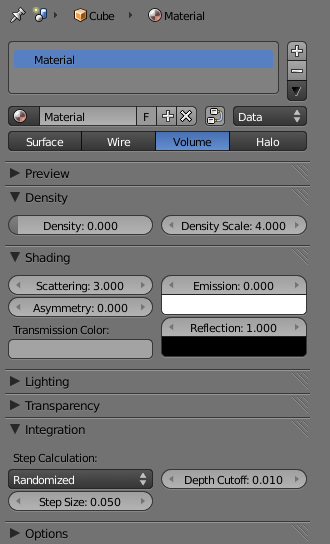
Now for the Domain Material and Textures. The domain gets the usual Volume Material with Density set to 0, Density Scale 4.0 and Scattering 3.0. For the Transmission Color I used a Hex-value of "A3A3A3". The crucial part is the Reflection Color which we will use to brightly color the smoke. Set it to 1.0 and the color to a complete black respective a Hex-value of "000000". The reason for this is that later on we will add a texture that will control the Reflection Color and values above "000000" will interfere with the colors defined by the texture.
The Step Size in the Integration-Section is by default way to high and will lead to corny artifacts in the smoke render. A value of 0.05 is a good start.
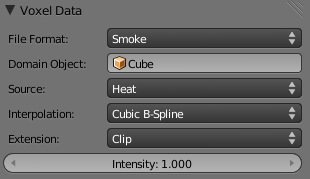
The first Voxel Data texture has the usual setup with Density as Source and will later define the smoke clouds themself. As method of Interpolation Cubic B-Spline is a good choice because it makes the transition between domain cells softer.
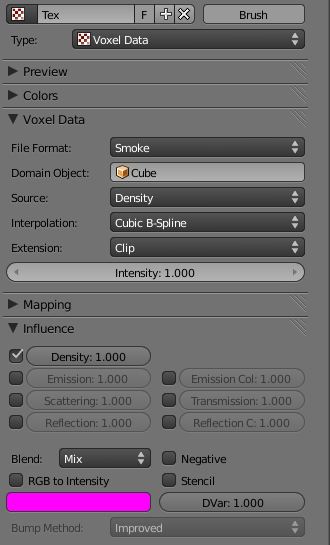
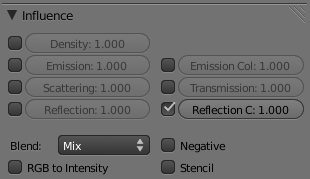
Now it's time for the core part of the setup: The second Voxel Data texture! As Source of the Voxel Data we will choose Heat and for the Interpolation once again Cubic B-Spline. For Influence choose only Reflection Color and keep the Blend at Mix.
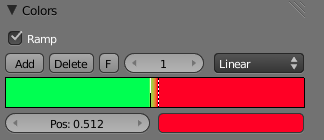
For the Colors we choose a Ramp with the following settings. Note that the stops in the colorband are very near to each other, making tweaking difficult.
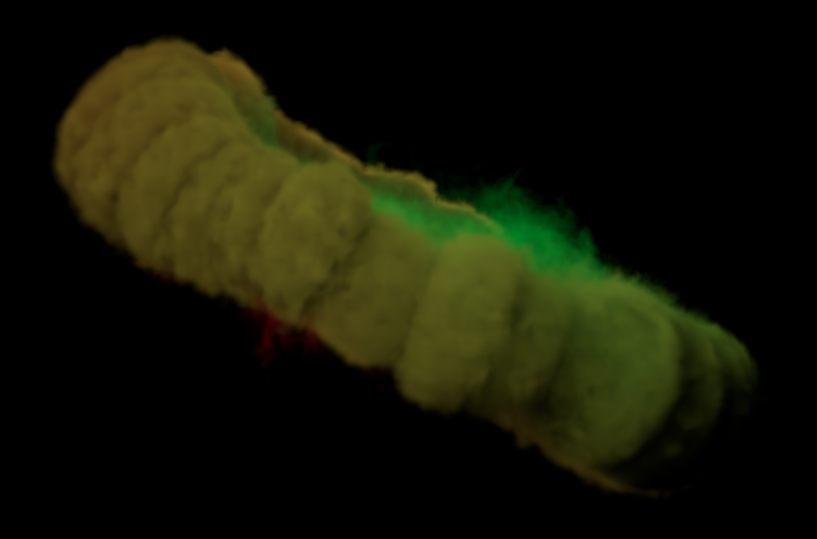
Now bake all dynamics, find a good frame and hit render! You might need to tweak some settings of the texture, but in the end you should end up with something really cool like this:
Download the finished Blendfile.
If you liked the tutorial, why not drop a comment below? And if you like the effect, drop a comment over at Nion's page!