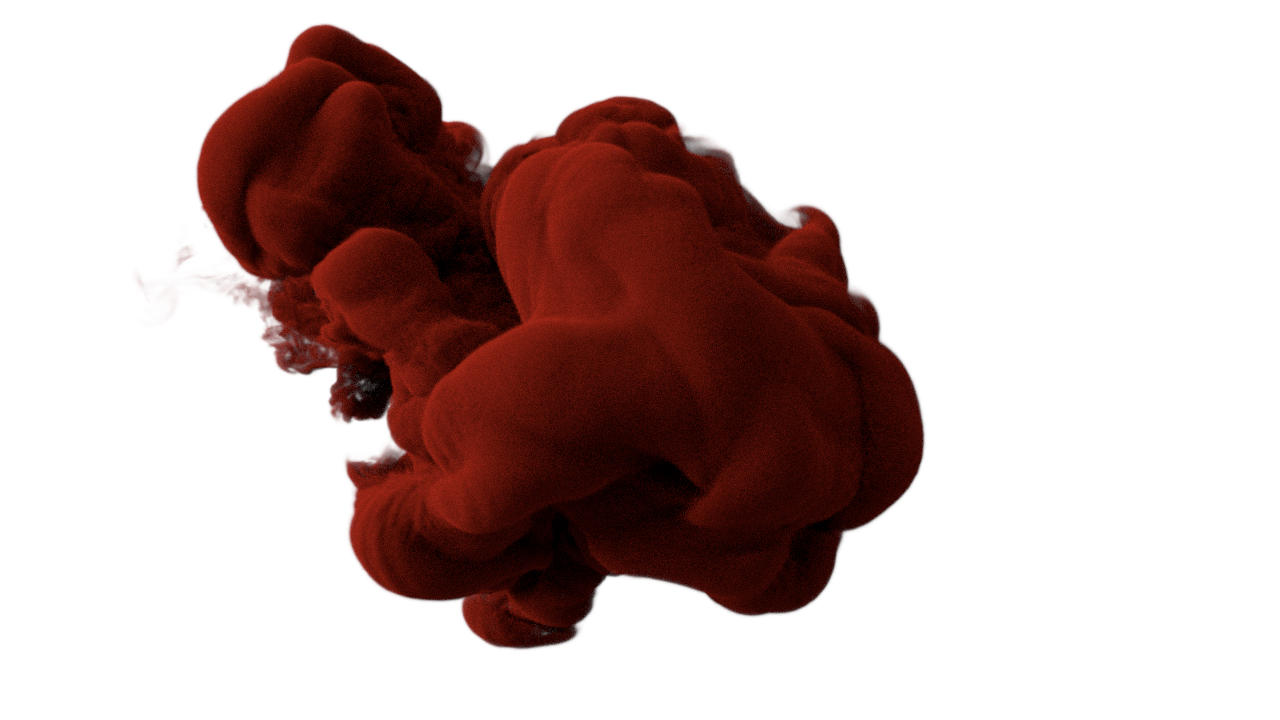
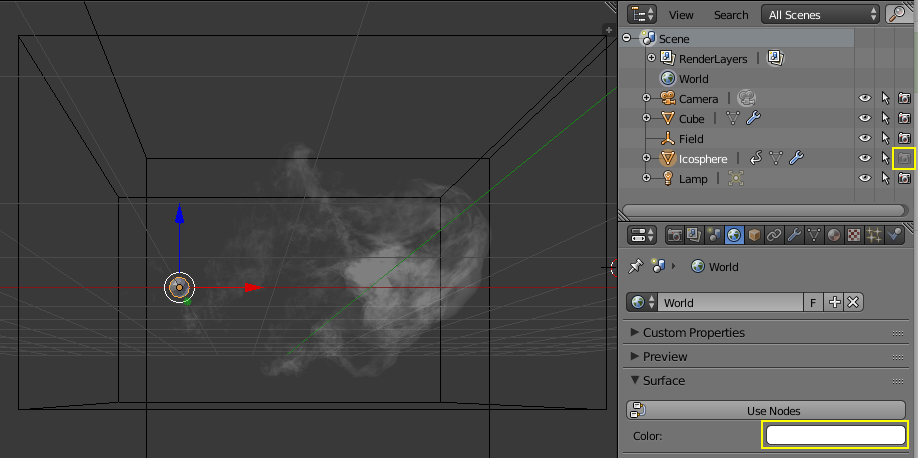
The emitter icosphere should not be rendered, so turn off its render visibility in the outliner. Also go to the world settings and make it completely white.
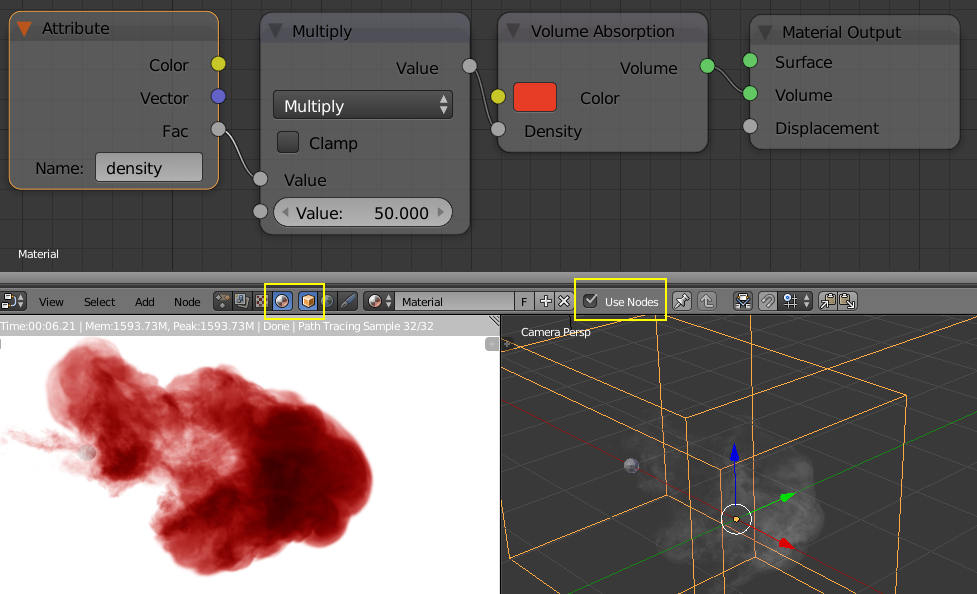
Select the domain and change the screen layout to "Compositing". Select material nodes and turn on "Use Nodes". Delete the Diffuse shader and add a volume absorption shader (Shift + A -> Shader -> Volume Absorption). Connect it to the volume input of the output node. Give it a color you like. Now when you turn on rendered view, the entire cube is absorbing light. To make the smoke simulation visible, it needs a node that tells it where to get that data from. There is no dedicated node for that yet but you can use the Attribute node (Shift + A -> Input -> Attribute) to access the smoke data. In the attribute node there is a text field. Enter "density" and connect the Fac output to the density input of the volume absorption node. Now you should see the ink drop, but it is just barely visible. You can increase the strength by adding a math node in between (Shift +A -> Converter -> Math) and setting it to multiply. In the example below I multiplied the density by a factor of 50:
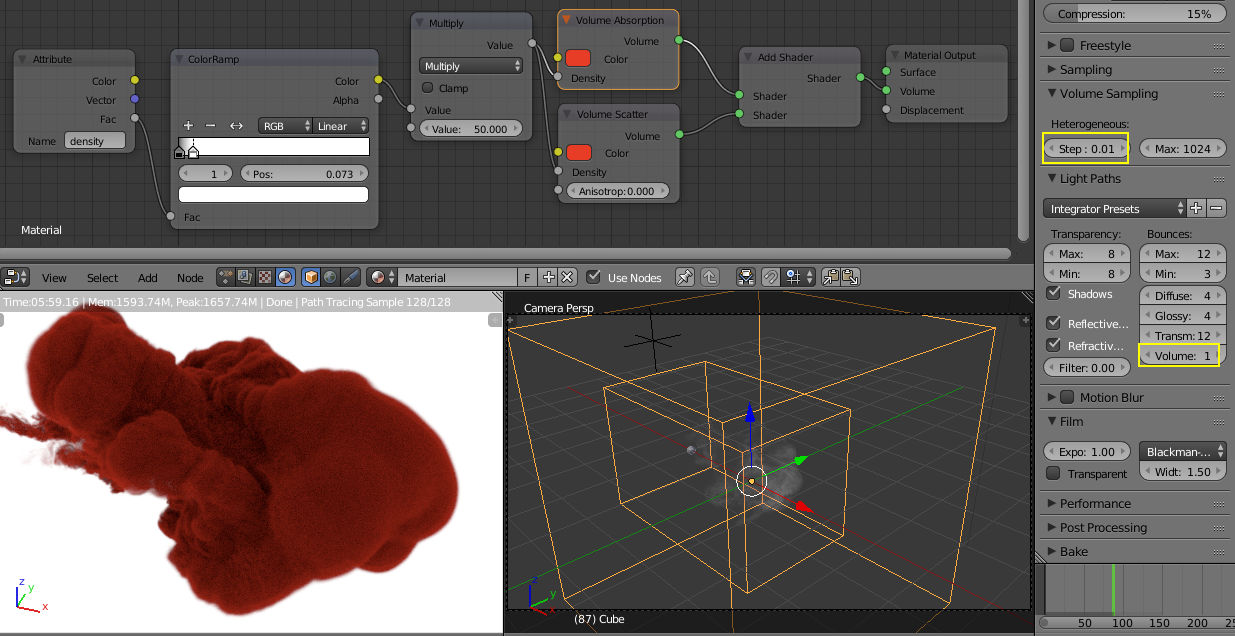
If this is the kind of ink you were looking for, you can render your image or animation now. This is actually a classic old-school ink drop and renders extremely fast. There is also a more modern version where photographers don't use traditional ink but rather water soluble paint that consists of lots of very tiny particles. For that you need an additional shader: Volume Scatter. To combine it correctly with volume absorption, use an Add shader (Shift +A -> Shader -> Add Shader) in between the volume absorption output and the material output's volume input. Then add a Volume Scatter shader (Shift + A -> Shader -> Volume Scatter) and connect it to the second input of the Add shader. Connect the output of the multiply node with the density input of the Volume Scatter shader and give it the same color as the Volume Absorption shader. If you turn on viewport rendering now, you will see an odd effect: The entire ink drop is now rendering black:
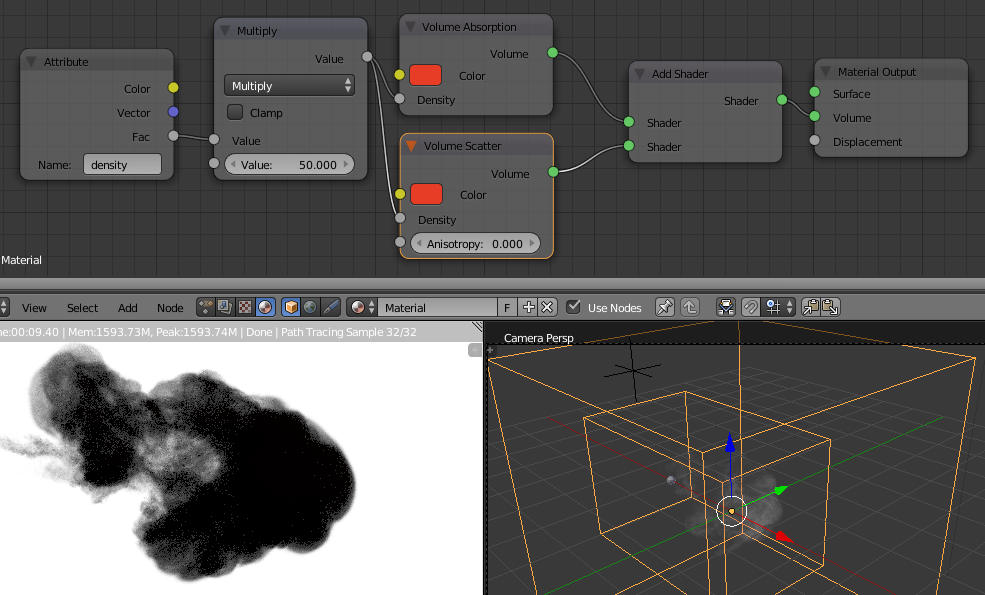
The reason for this is that at the default settings, volume scatter uses 0 bounces and for some very technical reasons this won't work with backgrounds that only have a single color. If you want to dig deeper into to the world of shadow rays and multiple importance sampling, check out The Cycles Encyclopedia! As a quick remedy for this problem, you could use an HDRI to light the scene. Or you could add a sun lamp. Or the most simple of them all: Go to the render tab in the properties editor, open the Light Paths panel there and turn volume up to one. This is the quickest solution, but it will also increase render time. Now the ink drop is rendering again. To make the surface more pronounced, add a ColorRamp (Shfit + A -> Converter -> ColorRamp) in between the Attribute node and the Multiply node and move the white stop to the left until you like the result. Using this technique, you can push the dense parts of the ink further towards the surface. You might encounter strange banding artifacts. To fix that, decrease the Step Size in the Volume Sampling panel. For my examples, a value of 0.01 was enough. Beware that this will also increase render time!
Now you are ready to render! If you create something nice with this tutorial, I'd really like to see your results, so feel free to post them in the comment section below. And if you want to see my final setup, you can download it below:
Download the finished .blend here!
- 1
- 2
