

")
This tutorial assumes that you are already familiar with the smoke simulation in Blender 2.5. If you need more information in that field, check out my other tutorials on the smoke simulation.
One key concept when working with 3D is to reuse your assets. The dinosaur models for Jurassic Park were later reused in other movies, and you should do the same with your creations. To show off the concept, I reused the initial setup of the smoke simulation from my Drum of Smoke Tutorial and with just a few clicks got a completely different result. So if you already followed the other tutorial, this one will be a piece of cake. First let's take a look at the final scene:
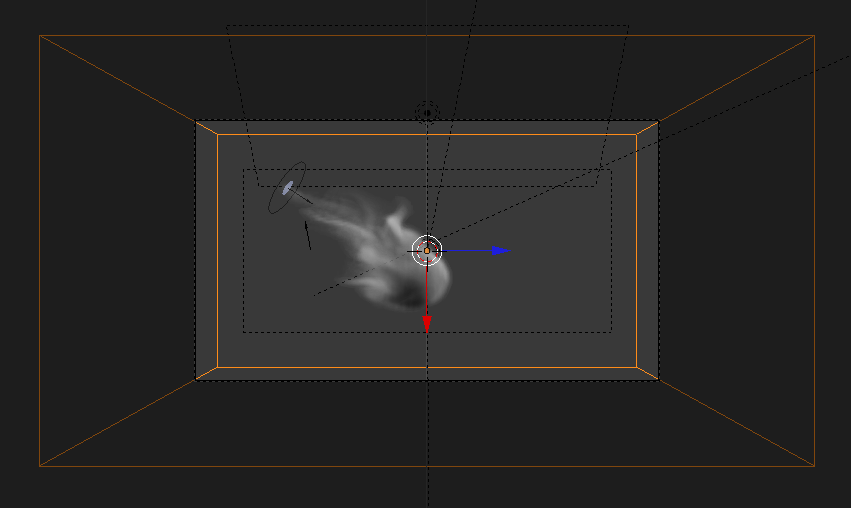
Once again just a domain, a camera pointing straight towards it and three area lights. The most important part are the two Force Fields you can see slightly at the left. The arrow marks a Turbulence Field that we will animate to move slowly through the scene while directly at the location of the emitter you can see a Wind Field which will blow the smoke towards the middle.
To begin either create the domain and lights manually or grab the Drum of Smoke Blendfile as a starter Blendfile here and delete the emitter and the vortex field. Change the background color in the World-Properties to a pure white. Add a plane and scale it down half by hitting S and then typing 0.5 on the Numpad. Now add a Subsurf Modifier at level 3 by hitting Ctrl+3 and apply it. Next add a Force Field of the type Wind. Now you can select both of them and move them to the desired location. Then rotate them as you wish. The following figure shows how to set up the Emitter and Wind Force Field at frame 1:
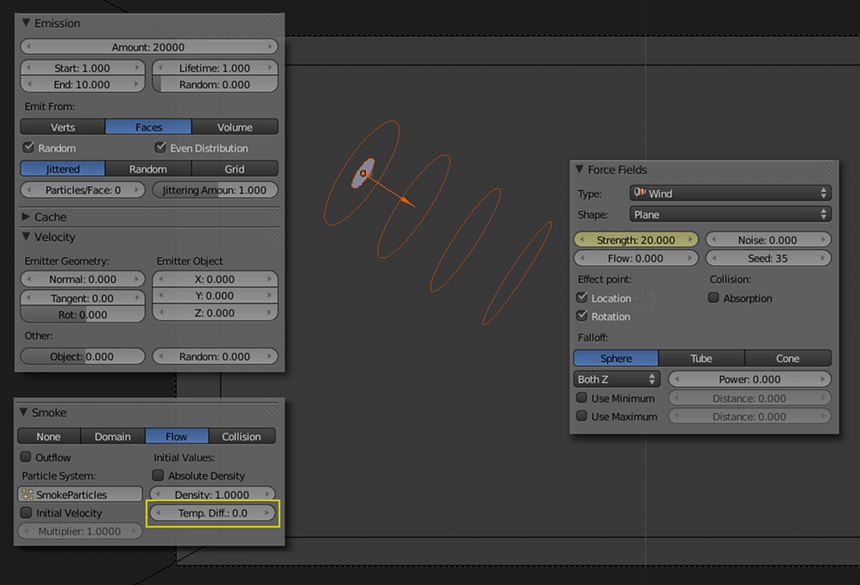
Notice that the Strength of the Wind Field is keyframed. Keyframe it for 10 frames at 20 and on frame 11 keyframe it to 0. Particles are also emitted on those 10 frames. The Temperature Difference for the emitter should be set to 0. Otherwise the ink will tend to move upwards.
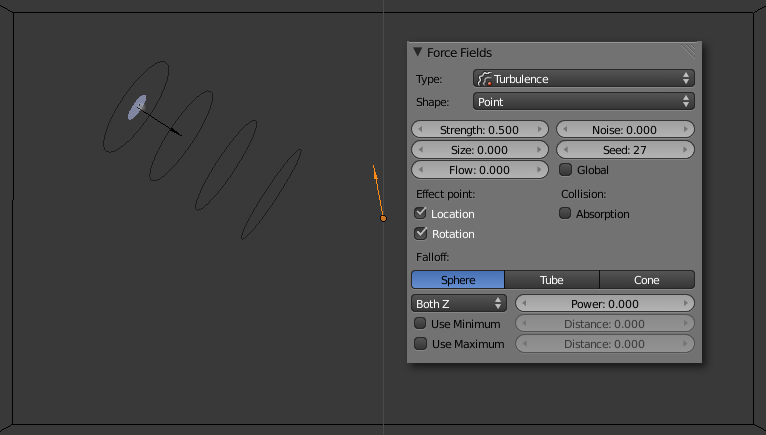
Now is a good time to add the Turbulence Field which will make the ink disperse nicely. To get a better effect it should move *very* slowly across the domain. For this tutorial I made it move from the middle of the domain to the left wall in a span of 400 frames, the direction does not matter that much, though. It's more important that the field just moves a little.
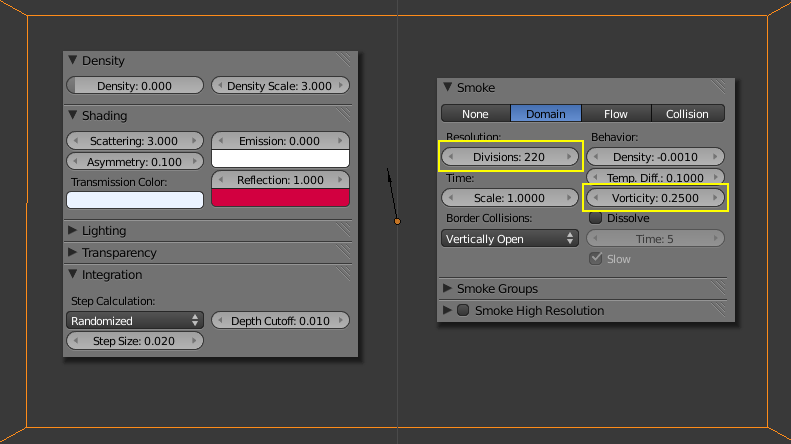
Next are the settings for the domain. The material is mostly the same as in the Drum of Smoke Tutorial but with a Reflection Color of "D20040". In the smoke settings of the domain no High Resolution is used. So the number of Divisions is set to the rather high value of 220 so you still get sharp lines. The Vorticity has been considerably lowered to 0.25:
The last and crucial part is the texture. Just one Voxel Data texture with Density as Source and Cubic B-Spline for the Interpolation is needed here. Make sure to only check Density in the Influence section. Most important is to set up the Ramp shader in a way that only the rim of the smoke cloud is visible. As color a simple white is perfect, the important part is the value for the alpha:
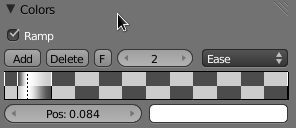
Here I used 0 at position 0.049, 1 at 0.084 and 0 again at 0.166. You will probably need to do some tweaking until you get the result you desire.
After baking and rendering you should get some really cool looking Ink in water effect that you can use for a variety of tasks. You can even control the motion of the Ink by using the variety of force fields Blender offers.
Question: The high number of divisions takes ages to bake and sucks up my RAM and disk space. I want to use the High Resolution smoke sim with wavelets Blender got to offer.
Answer: If you want to use the smoke High Resolution, you will have to set the Strength to a very low value like 0.01. This way the simulation gets sharpness but the look is not affected. You will also need to make the force fields stronger. The following simulation was conducted with a 96 normal divisions and 3 High Resolution divisions. Notice how the effect of the Force Fields is considerably weaker:
Question: This does not look like Ink in water at all!
Answer: Correct. It's a very stylized effect. Firstly it's slow motion and secondly only the rim of the ink is visible. You can easily tweak the settings to get a much more realistic result. If you know how, why not post a comment with your results below?
Download both Blendfiles and Videos in high quality here!
I'm always curious how you put the effect to use, so if you did something cool with it, please also post it in the comments. If you like the effect, head over to Nion's homepage and add a comment over there!
Related Items:


